


 August 3, 2026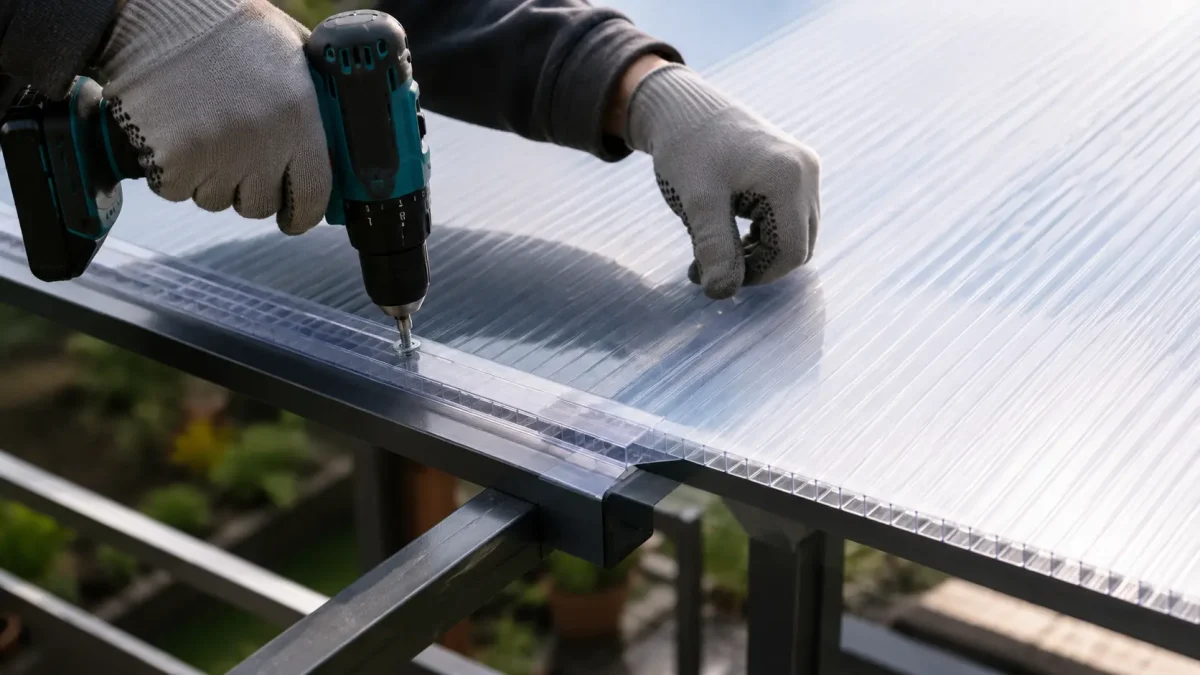
Multiwall polycarbonate is one of the most popular materials for greenhouses and lightweight canopies because it combines low weight with good insulation thanks to its channelled structure. However, to prevent the sheets from fogging up inside, cracking around fixings, and losing their appearance over the years, installation must take into account the direction of the chambers, thermal expansion gaps, correct sealing of the channels, and proper matching of profiles and seals.
What is multiwall polycarbonate?
Multiwall polycarbonate (channel polycarbonate) is a sheet made from polycarbonate resin through an extrusion process. It consists of layers connected by ribs that create internal chambers.
This construction provides a favourable strength-to-weight ratio and good thermal insulation properties, which is why the material is often chosen for greenhouses, enclosures, and canopies.
The source also states that polycarbonate is mechanically resistant across a wide temperature range, from −40°C to +120°C, which makes it suitable for outdoor use.
The most important material features
In practical use, several key characteristics matter most, and they appear in the majority of applications. The list below organises them in a “practical” way – focusing on what they actually mean during construction and everyday use.
Multiwall polycarbonate is valued, among other things, for:
- Resistance to moisture and low temperatures.
- Resistance to cracking and good mechanical strength.
- Thermal insulation properties resulting from its multiwall structure.
It is also worth remembering UV protection: the source emphasises that the sheets have a UV-protective layer, usually on one side only, and this is important during installation.
What does multiwall polycarbonate look like?

The easiest way to recognise it is by the channels (chambers) running along the length of the sheet.
The source material states that the standard width of a multiwall sheet is 2.1 m, while the length most commonly ranges from 2 to 7 metres. The chambers always run along the longer side.
This means that on the 2.1 m width side, the open channels are visible and must be protected using appropriate tapes and end profiles.
Chamber direction and water drainage
The direction of the chambers is not an aesthetic detail – it is a requirement for proper moisture drainage and for limiting dirt buildup inside the sheet.
The chambers should be positioned so that any condensation can move downwards and escape when the correct tape and profile are used.
If the chamber direction is reversed or sealed incorrectly, the sheet will lose transparency faster and will look worse even if the canopy itself is properly built.
How to choose the thickness of a multiwall polycarbonate sheet for a canopy?
Choosing the right thickness depends on whether the sheet will be used as greenhouse glazing or as a canopy exposed to snow and wind loads.
The source lists typical thicknesses for multiwall sheets (4, 6, 8, 10, 16 mm) and provides a practical rule: 4 and 6 mm sheets are more often used for greenhouses, while for canopies, sheets from 8 mm are usually chosen, often 10 mm and thicker – depending on the structure and the spacing of beams.
In addition to thickness, sheet density is also important, meaning the amount of raw material used per 1 m², as this affects rigidity and durability.
What should you check before buying?
Before choosing a specific sheet, it is a good idea to collect basic information about the structure and installation conditions. The checklist below helps you make a technical decision rather than guessing.
Before selecting a sheet, pay attention to:
- Standard sheet dimensions and the layout plan, because good planning reduces material waste.
- The canopy location and how exposed the structure will be to wind and snow.
- Thermal expansion and the need for expansion gaps.
- The slope of a mono-pitch roof and (if relevant) the bending radius for an arched roof.
- A complete set of accessories: joining and end profiles, tapes for sealing chambers, thermal washers, and screws.
Once this information is collected, it becomes easier to match the sheet thickness to the support spacing, and the whole structure will be more stable and less prone to bending.
Installing multiwall polycarbonate
General rules should be treated as an installation standard, because they most often determine the watertightness, durability, and appearance of the sheets after 1–2 seasons.
The source provides several specific values: a minimum roof slope of 5° (around 90 mm per 1 m) and a minimum beam width of 60 mm, which matters for supporting both the sheets and the profiles. It also states that the UV layer is located under the white printed film, and the UV-protected side must be installed facing outwards, towards the sun.
Rules you should not skip
Below are the rules that most often affect complaints and operational problems. Treat them as a control checklist before you start cutting and drilling.
When installing, remember that:
- Water runoff must be ensured, and the minimum slope is 5°.
- The UV layer must face outwards (as indicated by the printed film).
- The sheets can be bent, but only in the direction of the channels.
- You must not walk directly on the sheets; use wide boards supported on at least two structural members.
- Screw holes must have an extra clearance of 3–4 mm so the sheet can expand and contract and does not crack at the fixing points.
If you apply these rules from the start, the following installation stages will go faster and more smoothly, because you will avoid corrections, which are usually the most time-consuming part.
How to cut multiwall polycarbonate sheets?

Cutting should be done in a way that does not damage the chambers or leave debris inside them, because later it can be difficult to remove.
The source highlights that during cutting, the sheet must be stabilised to prevent vibration and tearing. For cutting along the channels, a wallpaper knife can be used, while for cutting across the sheet, a high-speed circular saw with fine teeth or a jigsaw works best.
After cutting, dust and debris should be removed from the open channels, for example with a vacuum cleaner or compressor.
Edge protection after cutting
After cutting the sheet, the most important “hygiene” stage begins: protecting the open chambers against dirt and water. The source states that two tapes are used for this: a solid tape on the upper edge and a vapour-permeable tape on the lower edge, which reduces condensation. The list below shows the simple rule that is easiest to remember.
The edge protection rule is as follows:
- The upper edges of the sheet are sealed with solid (sealing) tape.
- The lower edges of the sheet are sealed with vapour-permeable (perforated/grey) tape to reduce condensation.
Only after the edges are prepared this way should end profiles be installed, which close the sheet mechanically and improve its appearance.
Drilling holes

Drilling into multiwall polycarbonate is done using standard sharp metal drill bits, keeping the drill perpendicular.
The source recommends drilling holes between the stiffening ribs (the channel walls), at least 40 mm from the panel edge, and at a 90° angle.
The diameter is also crucial: the hole should be 3–4 mm larger than the screw diameter due to thermal expansion. As practical drill bit sizes, 6 and 10 mm were indicated.
Why is the clearance mandatory?
The sheet expands and contracts throughout the day and across the season. If it is fixed “tight”, stress builds up around the drilled points.
A 3–4 mm clearance works as a buffer, allowing the sheet to shift slightly without cracking.
It is a small detail, but it is usually what separates a durable installation from one that starts cracking after the first temperature changes.
Sealing the polycarbonate chambers
Sealing the chambers is one of the most important installation stages because it determines whether the sheet will continue to look good and maintain light transmission.
The source strongly emphasises that the chambers must not be left open, because this reduces service life and durability and also lowers light transmission due to dirt building up inside the channels.
After applying the tapes, end profiles are installed. Additionally, drainage holes are made in the profiles on the underside, every 2 m, with a diameter of 5–6 mm, to allow water to escape.
What accessories are used for sealing?
In practice, you need tapes and profiles, and the choice depends on whether you use aluminium or polycarbonate systems. The list below organises the elements in the order they are used.
To seal the chambers, the following are used:
- Solid tape on the upper edge.
- Vapour-permeable tape on the lower edge.
- An end profile, e.g. an aluminium F-shaped profile or a polycarbonate U-profile, installed over chambers already sealed with tape.
After installing the profiles, remember to drill drainage holes on the underside of the profile (every 2 m, diameter 5–6 mm), as this prevents water from collecting inside.
Joining multiwall polycarbonate sheets
Joins are the areas most exposed to bending and material movement, so they must be structurally planned.
The source describes three typical situations: joining directly on rafters, joining between rafters using battens in the same plane, and variants depending on the direction of the beams relative to the roof slope.
The choice of profile (polycarbonate H-profile, aluminium top clamping profile, or aluminium top-and-bottom system) depends on where the joint line falls and whether it is properly supported.
The most common joining scenarios
To make the choice easier, the scenarios below are described as short sequences. This way you can immediately see which profile type makes sense for your structure.
- If you only have beams (rafters), the sheet joint should fall on a beam, and a polycarbonate joining profile or an aluminium profile system (e.g. clamping or top-and-bottom) should be used.
- If the structure of rafters and cross battens is in one plane, the joint can fall between rafters, and support is provided by the lower part of the aluminium top-and-bottom profile resting on the batten.
- A similar logic applies to layouts where beams run along the building or where cross members are placed on top of beams, because supporting the joint line remains the key factor.
Regardless of the variant, the source also specifies installation parameters for profiles: screw holes should have a clearance of 3–4 mm, the maximum spacing between screws is around 35 cm, and an expansion gap between sheets should be maintained at around 2–5 mm.
Reducing noise from sheet movement
With terrace canopies, a common issue is the noise caused by the material expanding and contracting with temperature changes.
The source suggests using a bottom gasket across the entire structure or EPDM foam tape, which can reduce knocking and cracking sounds. The use of this tape is optional, depending on how sensitive the user is to noise. If maximum comfort matters, it is worth planning this before installing the first sheet.
Screwing down polycarbonate sheets

Fixing is the final stage, but it should not be done “by force”, because multiwall sheets can be damaged at the pressure points.
The source also describes the practical order of working with protective films: the clear film on the underside can be removed earlier, while the printed film (UV side) should only be peeled back about 50 mm from the edges to apply tapes and profiles and slide the sheet into joining profiles. The remaining film should be removed immediately after installation is completed.
It is also emphasised that screws should not be tightened too much, to avoid damaging the cellular structure.
The most important fixing and expansion rules
When fixing, the key factors are: working temperature, pressure, spacing of fixing points, and correct edge sealing. The points below combine the recommendations from the source into a coherent instruction.
When screwing down the sheets, remember that:
- Beams should be painted a light colour to reduce heating of the sheets from the structure.
- Before installation, open channels must be sealed with the correct tapes, and edges must additionally be protected with end profiles.
- The required expansion allowance is 3.5 mm per metre of sheet length or width.
- The screw hole should be 3–4 mm larger than the screw diameter.
- The source states that fixing points should be spaced no more than every 50 cm, and in areas exposed to strong wind, fixings should be placed more densely.
- The overhang of the sheet beyond the structure should not exceed around 100 mm.
After installation is finished, remove any remaining protective film, because if left in the sun it can stick to the sheet and make later cleaning difficult.
Maintaining multiwall polycarbonate sheets

Maintaining multiwall polycarbonate is simple, but it requires gentle handling. The source recommends periodic washing of the sheets, using a mild soap solution and a soft cloth, and avoiding brushes and sharp objects that could scratch the surface.
It also states that strong abrasives and certain solvents and alcohols (including butyl and isopropyl alcohols) should be avoided, as they may negatively affect the UV layer.
What does regular gentle cleaning achieve?
Regular cleaning not only improves appearance but also helps maintain good light transmission. With multiwall sheets, this is especially important because surface dirt quickly spoils the visual effect in greenhouses and canopies. If you stick to mild products and soft cloths, the risk of micro-scratches and dulling is much lower.
Pricing materials and accessories for a project
To select the sheets and a complete set of profiles and tapes, you need several details about the structure. The source provides a list of information required for pricing: the canopy width (along the building), canopy length (slope direction), distances between beams and cross members, slope direction, and the type of structure (metal/wood). The points below can be treated as a ready-made brief for pricing in your company.
For pricing, prepare:
- The width of the canopy (along the building).
- The length of the canopy (slope direction).
- Beam and cross member spacing.
- The slope direction.
- The structure material (metal or wood).
Once this information is collected, it is possible to select the sheet thickness, chamber layout, joining system, and all elements required to protect the chambers, which makes installation faster and reduces the need for corrections.
Conclusion
Installing multiwall polycarbonate is straightforward if you follow the basics: the correct roof slope, the correct UV-facing side, proper expansion allowances, and careful sealing of the chambers using tapes and end profiles.
Most problems occur when the channels are left open, holes are drilled “tight”, or the sheets are clamped too firmly, leaving no room for thermal movement.
If you plan the sheet layout according to the structure, protect the edges using the rule of solid tape at the top and vapour-permeable tape at the bottom, and ensure proper joining, your canopy or greenhouse will look good and function reliably for a long time.