


 August 3, 2026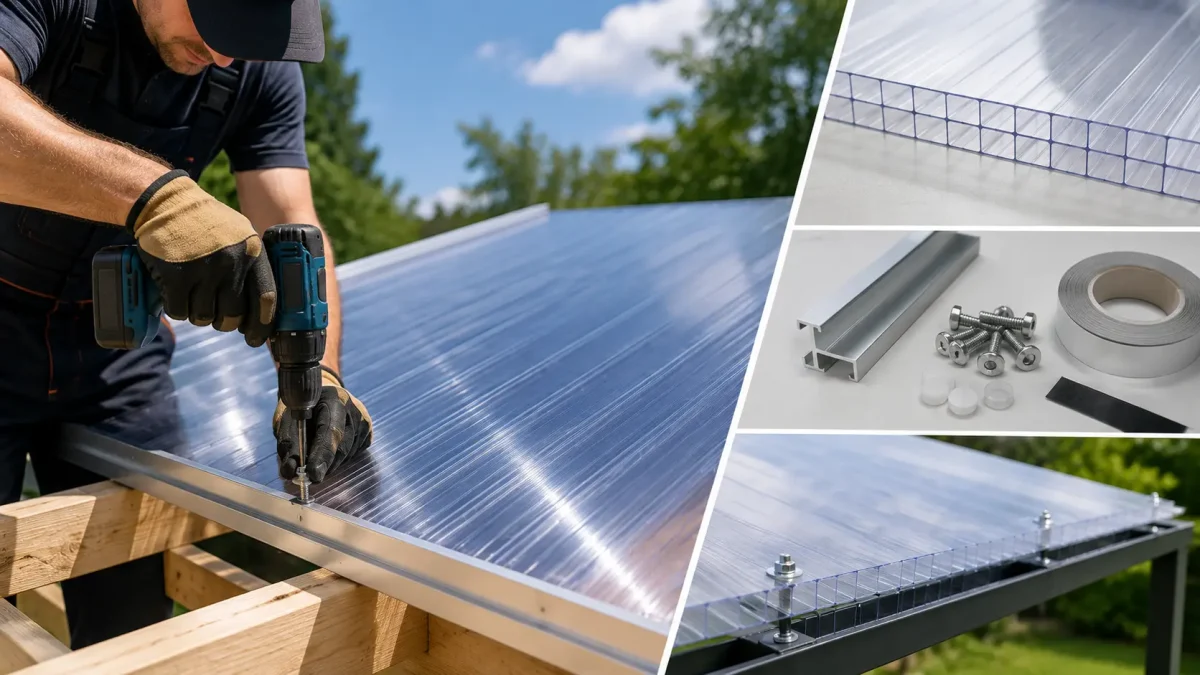
Polycarbonate sheets have become popular in construction due to their low weight, durability, and excellent thermal insulation properties. Ideal for greenhouses, roofing, and façades, they require precise installation to make full use of their potential. This step-by-step guide will take you through the entire process – from preparing the supporting surface and cutting and drilling the sheets to installation with the correct allowance for thermal expansion. Intended for both professionals and DIY enthusiasts, the guide explains technical concepts in simple terms so that anyone can achieve a durable and visually attractive result.
1. Preparing the supporting surface
Ensuring a suitable surface
The surface on which the polycarbonate is installed is crucial to the durability of the structure. An improperly prepared surface may cause stress or damage.
- Level and stability: Make sure the surface is flat and free from irregularities. Use a traditional or laser spirit level to check for deviations – the maximum permissible deviation is 2 mm per metre.
- Cleanliness: Remove dust, grease, and other contaminants using a brush, vacuum cleaner, or pressure washer. Dirt may weaken the adhesion or stability of the installation profiles.
- Dryness: The surface must be completely dry to prevent moisture accumulation, which could cause profile corrosion or mould inside the structure.
Required tools and materials
- Spirit level: A traditional or laser model for accurately checking the surface level.
- Protective film: Protects the sheets from scratches during transport and installation.
- Brushes and vacuum cleaner: Allow the surface to be cleaned thoroughly.
- Pressure washer: Useful for removing stubborn dirt. Use a low-pressure setting of no more than 100 bar.
2. Cutting polycarbonate sheets
Choosing tools and the correct cutting technique
Accurate cutting of polycarbonate is essential to prevent rough edges or cracks that could weaken the structure, such as a terrace roof.
- Circular saw: Choose a model with fine teeth, such as a carbide-tipped blade with 10-12 teeth per centimetre, to achieve smooth edges. Set the speed to 3,000-4,000 rpm.
- Hand saw: An alternative for smaller projects. Use a fine-toothed blade with a small cutting angle of 15-20°.
- Plastic cutting knife: Suitable for straight cuts in thin sheets measuring 4-6 mm.
Rules for accurate cutting
- Stable support: Place the sheet on a flat, solid surface, such as a workbench, and secure it with clamps to prevent vibration.
- Marking the cutting line: Use a marker and straightedge to draw precise lines. Leaving the protective film on the sheet makes marking easier and protects the surface from scratches.
- Removing debris: After cutting, clean the edges with a vacuum cleaner or compressed air to remove dust and shavings that could block the chambers.
Protecting the edges
Unprotected edges of multiwall polycarbonate are vulnerable to dust, moisture, and insects entering the chambers, which may lead to mould in greenhouses or roof structures.
- Vapour-permeable tape: Apply it to the lower edges to allow moisture to drain away.
- Solid sealing tape: Apply it to the upper edges to protect the chambers from contaminants.
- Closing profiles: Use U-shaped profiles for additional protection and a neat finish.
3. Drilling holes
Technique and preparation
Drilling polycarbonate requires care to prevent cracking or overheating, which may weaken the material, for example in acoustic barriers.
- Drill bits: Use HSS or carbide-tipped drill bits designed for plastics, with a point angle of 60-90°.
- Low speed: Set the drill to 500-1,000 rpm to minimise heat and stress.
- Safe distance: Drill holes at least 40 mm from the edge to prevent cracking.
- Hole diameter: The holes should be 2-3 mm larger than the screw diameter. For example, drill an 8-9 mm hole for a 6 mm screw.
Tip: Place a board or piece of plywood beneath the sheet to provide stability and prevent deformation while drilling. Remove shavings regularly with a vacuum cleaner.
4. Installing polycarbonate sheets
Step-by-step installation process
Correct installation ensures the durability and attractive appearance of structures such as rooflights and roofing.
- Preparing the supporting structure: Make sure the frames, such as aluminium or steel frames, are stable and evenly spaced. For multiwall polycarbonate, spacing is usually 50-70 cm. Use a spirit level to check that the structure is even.
- Inserting the sheets: Insert the sheets at least 20 mm into the clamping profiles. These profiles, such as aluminium H or U profiles, prevent the sheets from moving.
- Thermal expansion: Leave expansion gaps of 3-5 mm for every metre of sheet length or width, for example approximately 12 mm for a 3 m sheet. This allows the material to expand freely when the temperature changes.
- Fixing the sheets: Use screws with rubber or plastic washers and tighten them to a torque of 2-3 Nm. Position the screws every 50-70 cm to distribute the load evenly.
Ensuring durability
- Regular inspections: Check the fixings and expansion gaps every 6-12 months to identify looseness or deformation.
- UV protection: Make sure the UV-protected side faces outwards. It is identified by markings on the protective film.
- Following recommendations: Follow the manufacturer’s instructions regarding matters such as the maximum support spacing and the appropriate profile type.
Would you like to learn more about maintaining polycarbonate? Read our article “How to care for multiwall polycarbonate”, which explains in detail how to maintain the material so that your structures continue to look like new for many years.
5. Frequently asked questions (FAQ)
- Which tools are required to install polycarbonate?You will need a circular saw with a fine-toothed blade, a drill with HSS or carbide-tipped drill bits, a spirit level, vapour-permeable tape, installation profiles, screws with washers, and basic tools such as a tape measure, marker, and vacuum cleaner.
- Can I install polycarbonate sheets myself?Yes, people with basic DIY experience can install the sheets themselves, provided they follow the correct rules for cutting, drilling, and thermal expansion. Consult the experts at Oteko.pl in case of uncertainty.
- Why is an expansion gap so important?Polycarbonate may expand by 3-5 mm per metre as the temperature changes. Without expansion gaps, the sheets may deform or crack, particularly in roofs exposed to both high temperatures and frost.
- How should the edges of polycarbonate be protected?Use vapour-permeable tape on the lower edges and solid sealing tape on the upper edges to protect the chambers from dust, moisture, and insects. U-shaped profiles provide additional protection and a neat finish.
- How should polycarbonate be cleaned after installation?Wash the sheets with lukewarm water, a mild detergent such as washing-up liquid, and a soft sponge. Avoid abrasive brushes and chemicals that could damage the UV coating.
- What should I do if the sheets move?Check whether the expansion gaps are suitable at 3-5 mm per metre and whether the screws have been overtightened. Adjust the fixings and consult the manufacturer if the problem persists.
- Does polycarbonate require special profiles?Yes, dedicated profiles such as aluminium H, U, or F profiles provide watertightness, stability, and an attractive finish. Use them according to the recommendations for the specific type of polycarbonate.
Summary
Installing polycarbonate sheets is a process that requires precision and attention to detail, but this guide makes it possible for anyone to achieve professional results. From preparing the supporting surface and accurately cutting and drilling the sheets to allowing for thermal expansion during installation, every stage is essential. By using suitable tools, following the manufacturer’s recommendations, and inspecting the structure regularly, you can create a durable and visually attractive solution that will remain in use for many years.
Do you need support or additional information? Contact the Oteko.pl team – our experts will help you choose the right sheets and accessories and answer all your questions. With polycarbonate from Oteko, your projects will be both functional and visually attractive.