


 August 3, 2026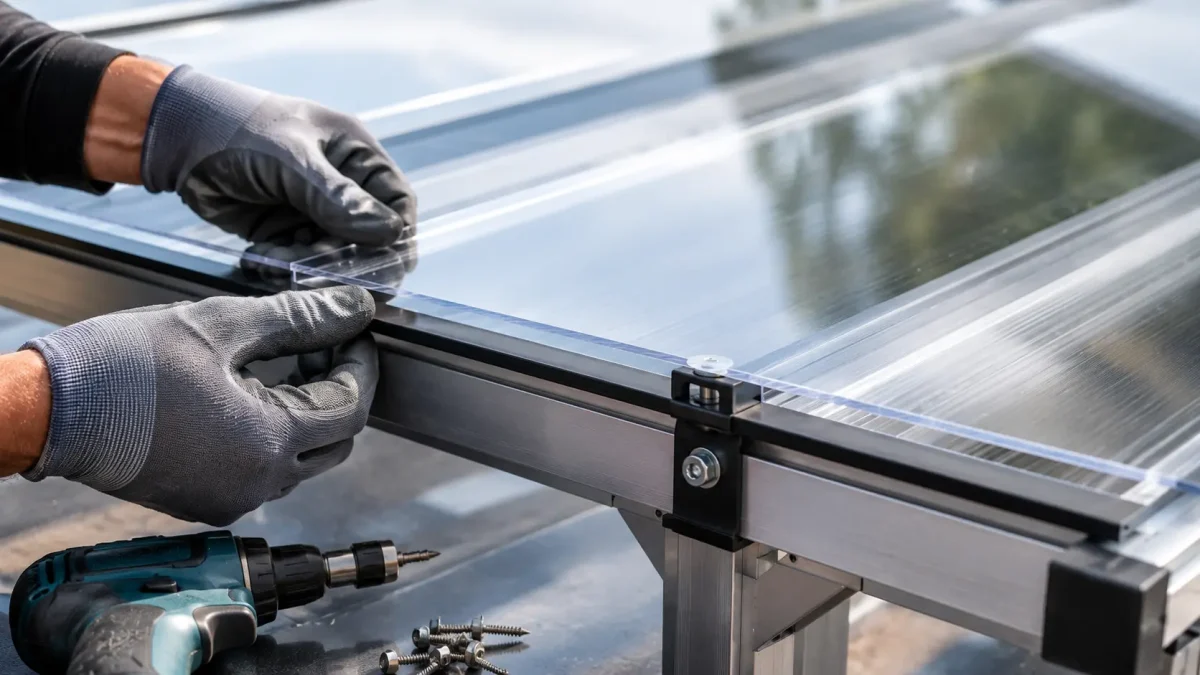
Solid polycarbonate is a material that combines excellent clarity with high impact resistance, while still being noticeably lighter than glass.
In practice, this means it is ideal for canopies and protective screens – but only if it is installed with proper allowance for thermal movement, the correct spacing of supports, and the use of suitable profiles and seals.
This guide organises the installation rules step by step: from the differences between sheet types, through structure design and thickness selection, to cutting, drilling, joining, fixing, and maintaining the finished installation.
How is solid polycarbonate different from multiwall polycarbonate?
Both materials are produced by extrusion from polycarbonate resin, but they have different structures and behave differently in use.
Multiwall polycarbonate has a channelled structure with air chambers, which makes it lightweight and provides good thermal insulation. For this reason, it is often used in greenhouses, conservatories, and lightweight canopies.
Solid polycarbonate has a fully solid structure and offers an effect closer to glass. It stands out for its high resistance to impact and mechanical damage, but it generally retains heat less effectively than the multiwall version.
When does solid polycarbonate have the advantage?
Solid sheets are most often chosen when clarity, safety, and impact resistance are important. They also perform well as protective screens and glazing in areas exposed to heavier use, where the risk of damage is higher.
Applications of solid polycarbonate
Solid polycarbonate is widely used in construction and industry because it withstands impacts well and performs reliably in more demanding weather conditions.
The source material also indicates an operating temperature range from approximately -40°C to +120°C, which shows that the sheets are suitable for outdoor use in a wide variety of conditions.
Below are typical examples of use, making it easier to match the material to your project.
You will most commonly find it in applications such as:
- Canopies for swimming pools, carports, gazebos, and terraces.
- Protective components for industrial machinery.
- Glazing for bus shelters and public buildings.
- Advertising, boards, and signage.
If your structure is exposed to hail or accidental impacts, solid polycarbonate can be a “safer” choice than many traditional glazing materials – provided you follow the installation and expansion rules.
Supporting structure for solid polycarbonate

The most important principle is designing the right supporting structure, as it determines the strength, durability, and safety of the canopy in the long term.
The structure is usually made of steel, aluminium, or timber, and for terrace canopies laminated timber is often used due to its durability and appearance.
Regardless of the material, the structure must account for wind and snow loads, as well as the fact that polycarbonate has high linear thermal expansion, meaning the sheets must have room to move.
What must the structure provide in practice?
The structure should carry loads while also avoiding localised stress points in the sheet.
In practice, this means correct support spacing, proper support at joining points, and sealing solutions between the sheet and the beam that stabilise the material and reduce noise. If this stage is done “by eye”, problems such as waviness, leaks, or cracking around fixings are much more likely later on.
How to choose sheet thickness for a canopy?
Selecting sheet thickness cannot be separated from local conditions, especially snow load in the region.
The source article provides snow load zones in Poland ranging from 70 kg/m² (Zone I) to 240 kg/m² (Zone V), showing how significantly structural and sheet requirements can vary.
Before choosing a specific thickness, organise the basic design information – this ensures the decision is logical rather than random.
What to consider before buying canopy sheets:
- Standard sheet sizes and the installation layout, to reduce waste when cutting.
- The canopy location and an assessment of exposure to wind and snow.
- Thermal expansion and required expansion gaps.
- The slope of a mono-pitch roof (or the roof geometry in your project).
- For arched roofs: bending parameters and the permitted bending radius/diameter.
- A complete set of installation accessories, including joining profiles, thermal washers, and screws.
It is also worth remembering the logic of support spacing and joining points. The source states that solid sheets have a standard width of 2.05 m and that sheet joints should fall on rafters. As practical spacing values between beams, it mentions, for example, 70 cm or 102 cm.
General installation notes for solid polycarbonate sheets
Before moving on to cutting and drilling, make sure you follow the general rules that most strongly affect watertightness and durability. The source material emphasises the need to ensure proper water drainage and indicates a minimum roof slope of 10°.
It also notes that sheets may have a UV layer on one or both sides, so installation must follow the markings on the protective film. The film itself should be removed after the work is completed to avoid scratching the surface during installation.
The most important rules worth applying as a standard on site:
- You must not walk directly on the sheets; during installation, use wide boards spanning at least two supports.
- Polycarbonate has high linear expansion; the source states that a temperature difference of 50°C results in an expansion of about 3.35 mm per metre of sheet, so a lack of expansion gaps leads to stress and operational issues.
- To reduce the risk of cracking at fixing points, the hole should be 3–4 mm larger than the screw diameter, as the sheet needs space for thermal movement.
If you apply these rules consistently, most typical defects (cracking around screws, waviness, noise from material movement, leaks) can be eliminated already at the installation stage.
How and with what should solid polycarbonate be cut?

Cutting should ideally be planned before starting work, to minimise waste and avoid improvising on the structure. The source states that cutting can be done using a circular saw, jigsaw, or a sharp hand-held metal saw. Tools should have fine teeth, which helps achieve a cleaner edge. For thin sheets with a thickness of around 1–3 mm, cutting with a utility knife is also acceptable, although it requires skill and caution.
Finally, remember safety and stable support of the sheet during work. The source material highlights the importance of health and safety rules, as improper support and vibration can lead to poor cut quality or damage.
Drilling holes in solid polycarbonate

Drilling should be done using sharp metal drill bits, held perpendicular to the surface to reduce the risk of tearing the material. The source states that the hole should be located at least 40 mm from the sheet edge and drilling should be carried out at a 90° angle. The most important rule, however, is allowing clearance for fixings: the hole must be 3–4 mm larger than the screw diameter, so the sheet has space to expand and contract.
In practice, properly drilled holes prevent micro-cracks, which often appear only after several cycles of temperature changes and canopy movement. If you ensure the correct distance from the edge and the correct diameter, the fixing will be more durable and more resistant to seasonal changes.
Joining solid polycarbonate sheets
Sheet joints must be planned so that the contact area is structurally supported and properly sealed. The source explains that when sheets are supported only on rafters (beams), the joint should fall on a rafter, as this is the area most exposed to bending under snow load. For joining, an aluminium connecting profile with a gasket is used, along with sealing on the beam, EPDM tape, or a bottom gasket. This solution is simple and safe, provided expansion gaps are maintained.
For structures with rafters and cross battens in the same plane, the source describes a solution using an aluminium top-and-bottom profile with seals, where the lower part of the profile provides joint support because it rests on the cross members. In this solution, maintaining an expansion gap between sheets becomes crucial, described in the source as around 15–20 mm.
How to fix aluminium joining profiles?
Profile fixing must ensure watertightness but cannot restrict material movement. The source indicates the use of screws with rubber washers, a maximum screw spacing of around 35 cm, and the need to drill holes larger than the screw diameter (the text mentions a rule of approximately 1.5× the screw diameter). It also emphasises leaving a gap of 15–20 mm between sheets to allow movement without stress.
It is also worth considering the practical issue of noise and “movement” in the canopy. The source notes that using a bottom gasket along the entire structure or EPDM foam tape can help reduce knocking and cracking sounds that may occur with temperature changes. This solution is optional, depending on how bothersome the noise is for the user.
Screwing down solid polycarbonate sheets

Fixing the sheets is the stage where it is easiest to ruin earlier work, so it should be done carefully and without rushing. The source notes that protective films should be removed after installation, and the remaining film should be taken off immediately after finishing work to avoid problems during later cleaning. It also highlights that sheets should not be installed too close together, as an expansion allowance of around 3.5 mm per metre of sheet length or width is required.
At this stage, selecting the correct fixing elements directly affects watertightness. The source indicates the use of thermal washers or screws with EPDM rubber washers as an alternative. Both solutions reduce water penetration into holes and protect components against corrosion. With proper hole clearance and sealing, the sheets move without cracking or loss of tightness.
Maintenance and cleaning of solid polycarbonate sheets

Proper maintenance does not require aggressive chemicals, but it does require regular cleaning and gentle tools. The source recommends periodic washing of the sheets, cleaning with a mild soap solution and a soft cloth, and avoiding brushes and sharp objects to prevent scratching the surface.
It also advises avoiding strong abrasive cleaners and certain solvents and alcohols (including butyl solvents and isopropyl alcohol), as they may negatively affect the UV layer.
With this type of cleaning, the sheets retain their clarity for longer, and the risk of dulling and micro-scratches is significantly lower. This is especially important for terrace and pergola canopies, where surface appearance matters throughout the year.
Pricing solid polycarbonate and installation accessories for a project
To make the quotation accurate, you need to describe the project in a way that allows not only the sheets but also profiles, seals, and fixings to be selected.
The source lists the set of data required for pricing: canopy width, slope direction and value, canopy length along the building, spacing between rafters and battens, and optionally a technical drawing.
If you gather this information in advance, it will be easier to match sheet formats and avoid mistakes during installation.
Prepare the following for a quotation:
- Canopy width (slope length from the wall).
- Slope direction and slope percentage/value.
- Canopy length along the building.
- Spacing between rafters and battens.
- Technical drawing (if available).
Based on this data, it is possible to select the sheet thickness, joint layout, and the full set of accessories, ensuring the project is technically consistent and visually neat.
Conclusion
Correct installation of solid polycarbonate comes down to three pillars: a well-designed supporting structure, proper expansion gaps, and the use of suitable profiles and seals.
If you ensure the roof slope, drill correctly with the required fixing clearance, support joints on load-bearing elements, and clean gently without aggressive chemicals, the canopy will remain watertight, stable, and durable for many years.
In practice, most problems result from installing sheets “too rigidly” and ignoring small details, which is why it is worth following these rules from the very first measurement to removing the protective film after completing the work.